How to Choose Laminate Flooring for Your Home: Practical Tips & Style Ideas

Laminate Flooring

Changing the floors in your home is a big step. It’s not just about picking something that looks “okay.” Your floor is the foundation of every room, and it’s what you feel under your feet every single morning. While many homeowners dream of the classic look of parquet flooring, most people nowadays choose laminate flooring because it’s tough, looks great, and won’t break the bank. But how do you pick the right one? Let’s keep it simple and look at what really matters.

Things to Consider Before You Choose a Floor

First, think about your daily life. Do you have a dog running around or kids dropping toys? You need a floor that can handle some stress. This is where parquet flooring laminate options shine. They are built to resist scratches much better than real wood. In fact, modern technology has improved so much that you no longer have to worry about moisture in high-risk areas. Many families now safely install kitchen laminate flooring or even bathroom laminate flooring to get that warm wood look in places where water used to be a problem. Also, check your subfloor. Is it flat? Is it dry? These little details will help your laminate flooring last for decades without any annoying squeaks or gaps.

Laminate Parquet Flooring Styles That Match Your Interior

Your home has its own vibe, and your floor should support that. If you love a modern look, you might want something sleek and clean. For those who want a more traditional or cozy feeling, parquet flooring is a classic choice. Using laminate wood flooring gives you that high-end look of real timber, but with much less maintenance. It’s all about creating a flow from one room to the next.

Color Selection: Bright, Warm, or Modern Looks

Color changes everything. If you have a small, dark room, using bright laminate flooring can make it feel much bigger and more open. On the other hand, warm tones in parquet wood flooring make a large living room feel extra cozy. If you want a “magazine look,” many people are now choosing grey or cool-toned laminate parquet flooring to match their modern furniture.

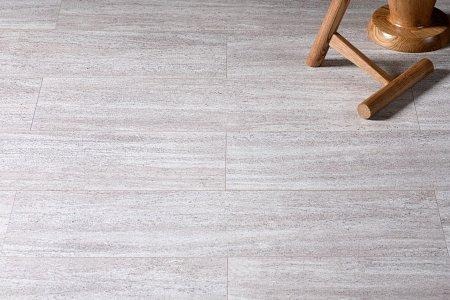
Texture & Finish: Matte vs Embossed Surfaces

Don’t forget to think about how the floor feels. A matte finish on laminate wood flooring is very popular right now because it doesn’t show footprints or dust as much. But if you want something that looks very realistic, go for an embossed surface. This texture follows the wood grain, so your laminate flooring feels like real, natural planks when you touch it.

Room-by-Room Guide: Living Room, Bedroom, Hallway

Different rooms need different things. In the bedroom, you want comfort and warmth, so a standard parquet flooring is perfect. In high-traffic areas like the hallway, you need extra durability. What about wet areas? Well, thanks to new technology, you can now find specialized kitchen laminate flooring and bathroom laminate flooring. These are designed to handle spills and moisture, so you don’t have to worry about the wood swelling. You can even use parquet wood flooring styles in these areas if the product is rated for it.

Key Performance Factors: Durability & Daily Use

Let’s be honest: life is messy. You need a floor that can keep up. High-quality parquet laminate flooring is rated by its “AC rating,” which tells you how much wear it can take. A good laminate parquet flooring will stay beautiful even after years of cleaning, walking, and living. It’s an investment in your home’s future.

Discover AGT Laminate Flooring Collections

If you want quality you can trust, AGT has some of the best options out there. Their parquet laminate flooring collections are famous for being both stylish and incredibly strong. Whether you are looking for a rustic look or something very modern, AGT’s parquet flooring laminate choices give you the best of both worlds: beauty and performance.

What Causes Mold in a House and How to Prevent It

mold

Mold is a common problem in many homes, especially in areas with moisture and poor airflow. It often starts small but can spread quickly if not addressed early. Knowing the causes of mold in a house is the first step toward preventing serious damage and health issues.

Many homeowners do not realize mold is growing until it becomes visible to the eye or causes a strong odor. By the time mold is noticed, it may already be affecting walls, floors, or furniture. Learning how mold develops helps you stop it before it becomes a bigger problem.

Why Does Mold Grow in Houses?

Mold is a type of fungus that grows in damp and humid environments. It spreads through tiny spores that float in the air and settle on wet surfaces. Once mold finds moisture, it begins to grow and multiply.

Homes provide many conditions that mold needs to survive. Warm temperatures, organic materials, and moisture create the perfect environment for growth. Common materials like drywall, wood, and carpet make mold easy to spread indoors.

Common Causes of Mold in a House

Mold growth is almost always linked to excess moisture inside the home. This moisture can come from leaks, humidity, or poor ventilation. Identifying the source of moisture is essential to stopping mold at its root.

Some homes experience mold problems more often due to design or location. Older houses and homes in humid climates are especially at risk. Without proper maintenance, mold can return even after cleaning.

High Humidity Levels

High indoor humidity is one of the most common causes of mold in a house. When moisture stays in the air, it settles on surfaces like walls and ceilings. Bathrooms, kitchens, and basements are especially vulnerable.

Everyday activities can raise humidity levels indoors. Showering, cooking, and drying clothes indoors all add moisture to the air. Without proper ventilation, this moisture allows mold to grow.

Water Leaks and Plumbing Problems

Leaking pipes are a major source of hidden moisture in homes. Even small drips can soak walls, floors, or cabinets over time. Mold often grows unnoticed behind walls where leaks occur.

Roof leaks can also cause mold problems. Water may enter during rain and collect in ceilings or insulation. If leaks are not repaired quickly, mold can spread across large areas.

Poor Ventilation

Poor airflow traps moisture inside the home. Without ventilation, damp air has nowhere to escape. This creates ideal conditions for mold growth.

Bathrooms and laundry rooms often lack enough ventilation. Steam from showers and washing machines raises moisture levels quickly. Exhaust fans help remove moisture before mold can form.

Flooding or Water Damage

Flooding introduces large amounts of water into a home in a short time. Carpets, drywall, and furniture absorb water quickly. If these materials are not dried fast, mold can begin growing within days.

Water damage from burst pipes or storms can be just as harmful. Even clean water can lead to mold if it remains too long. Quick cleanup and drying are critical after any water event.

Condensation on Windows and Walls

Condensation forms when warm air meets cold surfaces. Water droplets collect on windows, walls, and pipes. This moisture can lead to mold growth over time.

Condensation is common during colder months. Poor insulation and temperature differences increase the problem. Regularly wiping condensation helps reduce mold risk.

Early Signs of Mold in Your Home

Mold does not always appear right away. Often, the first sign is a musty or earthy smell. This odor usually means mold is growing somewhere hidden.

Visible spots may appear on walls, ceilings, or floors. Mold can be black, green, white, or gray in color. Peeling paint or warped surfaces can also signal moisture problems.

Health Risks Caused by Mold Exposure

Mold exposure can affect indoor air quality. Breathing in mold spores may cause coughing, sneezing, or throat irritation. People with allergies often notice symptoms first.

Long-term exposure can lead to more serious health issues. Mold may worsen asthma or trigger respiratory infections. Children, seniors, and people with weakened immune systems are most at risk.

How to Prevent Mold in a House

Preventing mold starts with controlling moisture. Keeping your home dry and well-ventilated reduces mold growth. Regular maintenance plays a key role in prevention.

Simple habits can make a big difference. Addressing small issues early prevents larger problems later. Mold prevention is easier and cheaper than mold removal.

Control Indoor Humidity

Keeping humidity levels between 30 and 50 percent helps prevent mold. A hygrometer can measure indoor humidity accurately. Dehumidifiers are useful in damp areas like basements.

Air conditioners also help remove moisture from the air. Running them during humid weather reduces indoor dampness. Consistent humidity control limits mold growth.

Fix Leaks Immediately

Leaks should be repaired as soon as they are discovered. Delaying repairs allows moisture to spread and soak materials. Even minor leaks can lead to mold problems.

Regularly inspect plumbing, roofs, and appliances. Look for water stains, damp smells, or peeling paint. Early detection saves time and money.

Improve Ventilation

Good airflow helps moisture escape from your home. Use exhaust fans in bathrooms, kitchens, and laundry rooms. Run fans during and after moisture-producing activities.

Opening windows also improves airflow when weather allows. Fresh air helps dry damp spaces naturally. Proper ventilation keeps surfaces dry and mold-free.

Clean and Dry Wet Areas Quickly

Wet surfaces should be dried within 24 to 48 hours. Mold can begin growing after this time frame. Fast action is critical after spills or leaks.

Use fans, towels, and dehumidifiers to dry affected areas. Remove wet carpets or rugs if needed. Quick drying prevents mold from taking hold.

Maintain Gutters and Drainage

Clogged gutters can cause water to pool near the home. This water may seep into walls or foundations. Proper drainage directs water away from the house.

Clean gutters regularly to prevent overflow. Ensure downspouts point away from the foundation. Good drainage reduces moisture problems indoors.

Can You Remove Mold Yourself or Should You Call a Professional?

Small mold areas can sometimes be cleaned safely. Non-porous surfaces like tile or glass are easier to clean. Protective gloves and masks should always be used.

Large mold problems or hidden mold should always be handled by professionals, such as licensed mold remediation services in New York. Mold inside walls, ceilings, or HVAC systems can spread quickly and is unsafe to remove without proper training. Professionals use advanced equipment to locate hidden mold, remove it safely, and help prevent future growth.

When Mold Prevention Is Not Enough

Some mold problems are not visible to homeowners. Hidden moisture inside walls or under floors may continue feeding mold. In these cases, professional inspections are necessary.

If mold keeps returning, the source of moisture may still exist. Structural issues or ongoing leaks must be addressed. Long-term solutions protect both health and property.

Conclusion

Mold in a house is caused by moisture, humidity, and poor ventilation. Understanding these causes helps homeowners take preventive action early. Simple steps can greatly reduce mold risk.

Preventing mold protects your health and your home’s value. Quick repairs, proper airflow, and moisture control are key. Acting early ensures a safer and healthier living space.

The Environmental Benefits of Eco-Friendly House Cleaning Services

Cleaning

House cleaning has a reputation problem. It’s often associated with strong chemical smells, disposable wipes, and bottles under the sink that come with more warning labels than instructions. For years, “clean” has quietly meant “chemically aggressive,” even when no one really wanted that trade-off.

That mindset is starting to change.

Eco-friendly house cleaning services are gaining traction—not because they’re trendy, but because they make practical sense. Businesses like Cleanbee cleaning services are part of a broader shift toward cleaning methods that work with the environment instead of against it. And while the benefits are often marketed as “green,” the real impact goes much deeper than a few buzzwords.

Let’s explore the environmental benefits of eco-friendly house cleaning services, and why this approach is becoming the smarter default rather than a niche alternative.


Fewer Harmful Chemicals Enter the Ecosystem

What Goes Down the Drain Doesn’t Disappear

Traditional cleaning products often contain harsh chemicals that don’t magically vanish once rinsed away. They travel through wastewater systems and can eventually end up in rivers, lakes, and soil.

Eco-friendly house cleaning services prioritize biodegradable, low-toxicity products that break down more safely once they leave your home. This reduces chemical pollution at a scale that most households never see—but ecosystems definitely feel.

When cleaning solutions are designed to degrade naturally, they stop contributing to long-term environmental damage. That’s not idealism. That’s chemistry doing its job responsibly.


Reduced Air Pollution Inside and Outside the Home

Clean Shouldn’t Smell Like a Warning Sign

Many conventional cleaning products release volatile organic compounds (VOCs). These contribute to indoor air pollution and, once vented outside, add to broader air quality issues.

Eco-friendly cleaning products are formulated to minimize VOC emissions. That means fewer pollutants in the air—both inside homes and beyond them.

Cleanbee cleaning services, like other environmentally conscious providers, operate on the idea that cleanliness shouldn’t come at the cost of breathable air. The absence of overpowering chemical smells isn’t a compromise. It’s a benefit.


Lower Water Pollution Through Smarter Product Choices

Gentle Doesn’t Mean Ineffective

There’s a persistent myth that eco-friendly cleaning is somehow weaker. In reality, modern green cleaning agents are designed to be effective without leaving behind harmful residues.

By using products that clean efficiently without heavy chemical loads, eco-friendly house cleaning services reduce the volume of pollutants entering water systems.

This matters because water treatment facilities aren’t designed to filter out every synthetic compound. The less harmful material introduced, the healthier downstream ecosystems remain.


Less Plastic Waste Over Time

Refill Beats Replace

Plastic packaging is one of the quiet environmental costs of household cleaning. Spray bottles, disposable wipes, and single-use containers add up quickly.

Eco-conscious cleaning services often rely on refill systems, concentrated solutions, and reusable tools. This significantly reduces plastic waste over time.

Cleanbee cleaning services and similar providers tend to view packaging as part of the environmental equation, not an afterthought. Fewer bottles used means fewer bottles discarded—and fewer microplastics entering the environment.


Reduced Chemical Runoff in Urban Areas

Cities Feel the Impact First

In urban environments, runoff from homes doesn’t have far to travel before reaching drainage systems. Strong chemicals used indoors can quickly find their way into local waterways during routine cleaning.

Eco-friendly house cleaning services help reduce this impact by using formulations that are safer for municipal systems and surrounding ecosystems.

This is particularly important in densely populated areas, where the cumulative effect of small household choices becomes significant very quickly.


Supporting Sustainable Manufacturing Practices

Cleaning Choices Influence Supply Chains

Eco-friendly cleaning services don’t just change what happens inside homes—they influence what happens upstream.

By choosing products made through sustainable manufacturing processes, these services support companies that:

  • Use renewable resources
  • Reduce energy consumption
  • Minimize waste during production

When services like Cleanbee cleaning services prioritize environmentally responsible suppliers, they contribute to a market shift that rewards sustainability rather than shortcuts.


Less Environmental Impact Without Sacrificing Results

Clean Is Still Clean

One of the most compelling environmental benefits of eco-friendly house cleaning services is that they don’t require sacrificing results.

Modern green cleaning methods are designed to handle everyday dirt, grease, and bacteria effectively—without relying on ingredients that linger in the environment long after the job is done.

The goal isn’t to clean less. It’s to clean smarter.


Healthier Homes Support Environmental Awareness

What’s Good for People Is Often Good for the Planet

Eco-friendly house cleaning services tend to reduce exposure to harsh chemicals for both residents and cleaners. This creates healthier indoor environments, which in turn encourages more sustainable habits.

When people experience clean spaces without chemical irritation, they’re more likely to support environmentally responsible practices long-term.

Sustainability works best when it feels practical, not punitive.


Lower Energy Use Through Efficient Cleaning Practices

Less Waste, Less Effort

Eco-conscious cleaning often involves optimized routines that reduce water and energy usage. Efficient cleaning methods, microfiber tools, and targeted product use all contribute to lower resource consumption.

It’s not about rushing. It’s about avoiding wasteful repetition.

Over time, these efficiencies reduce the environmental footprint of routine house cleaning in measurable ways.


Cleaner Homes Without Long-Term Environmental Debt

The Hidden Cost of “Instant Clean”

Some traditional cleaning products deliver immediate results at the expense of long-term environmental damage. Eco-friendly house cleaning services take the opposite approach: sustainable cleanliness without hidden costs.

By reducing pollution, waste, and resource strain, services like Cleanbee cleaning services help households maintain clean spaces without contributing to environmental debt that future generations inherit.


Why Small Changes Matter at Scale

Individual Homes Add Up

One eco-friendly cleaning service might seem insignificant in isolation. Thousands of them, operating weekly across communities, create meaningful impact.

House cleaning happens frequently. That repetition makes it a powerful opportunity for environmental improvement—without requiring lifestyle overhauls or major sacrifices.

Consistency is where sustainability becomes real.


Eco-friendly house cleaning services aren’t just about feeling good or following trends. They’re about reducing pollution, conserving resources, and making everyday routines less harmful to the environment.

Services like Cleanbee cleaning services demonstrate that effective cleaning and environmental responsibility aren’t competing goals. They’re compatible—and increasingly inseparable.

The cleanest homes don’t have to come with the dirtiest environmental footprint. Sometimes, the most responsible choice is simply choosing to clean differently.

A Practical Guide to Upgrading Windows and Doors for Comfort, Efficiency, and Long-Term Value

Windows

Windows and doors do more than frame a view or match your exterior style. They control drafts, indoor comfort, noise, and even how hard your HVAC system has to work. If your home feels chilly near the glass in winter, too warm in certain rooms in summer, or you constantly wipe condensation off the inside of panes, your openings are sending you signals.

If you are researching options and want a clear sense of what a proper upgrade process looks like, this page about Professional Window Replacement Services in Woodbridge is a helpful reference point for understanding typical replacement considerations without needing to treat it like a sales pitch. Use it as a checklist for what you should expect from any reputable provider.

Below is a homeowner-friendly framework to help you choose improvements that actually move the needle on comfort and performance, not just appearance.

Start with the symptoms, not the style

A lot of people begin with “I want black frames” or “I want bigger glass,” but the best upgrades start with what your home is doing today. Walk room by room and note:

  • Drafts near frames or sills (often tied to air leakage, worn weatherstripping, or poor installation details)
  • Cold glass and uncomfortable “radiant chill” when you sit nearby
  • Condensation or frost on the interior during cold snaps
  • Sticking doors, hard-to-lock handles, or rubbing sashes
  • Outdoor noise that feels louder than it should

These symptoms help narrow the solution. For example, condensation might point to high indoor humidity, a thermal bridge, or failed sealed units, not simply “old windows.”

Understand performance basics that matter in real life

Product labels can feel like alphabet soup, so focus on the few factors that influence comfort in a Canadian climate.

Glass package (double vs triple pane):
Triple-pane glass can noticeably improve comfort near windows in winter, especially in bedrooms and north-facing rooms. Double pane can still perform well, but the best choice depends on exposure, room use, and budget.

Low-E coatings and gas fills:
Low-E coatings reduce heat transfer through the glass. Gas fills (often argon) slow down conductive heat loss. Together, they can reduce cold spots and help maintain steadier indoor temperatures.

Air leakage:
Even great glass will underperform if air sneaks around the frame. A tight unit with good sealing and correct installation often feels “quieter” and more comfortable because drafts disappear.

Spacer technology:
The edge of glass is a common weak point. Better spacers can reduce the risk of cold-edge condensation and improve durability.

If you remember one thing, make it this: the best window on paper can still disappoint if it is installed poorly.

Pay special attention to doors because they fail differently

Doors take more abuse than windows. They are opened, closed, kicked by slush-covered boots, baked by sun, and slammed by wind. When doors underperform, you often notice it as:

  • A cold draft at the bottom
  • Light visible around the weatherstripping
  • A deadbolt that suddenly misaligns
  • Water staining near the threshold

For entry doors, prioritize a strong core, a well-designed threshold, and quality weatherstripping. For patio doors, focus on smooth operation, reliable locks, and proper water management at the sill. Many comfort complaints come from the bottom 2 inches of a door system, not the slab itself.

Installation quality is where comfort is won or lost

Homeowners often compare frame materials and glass options while overlooking the bigger driver of satisfaction: the install details. A solid installation should address:

Air sealing:
A continuous air seal around the opening helps stop drafts. This is not just about stuffing insulation into gaps. The goal is controlled, durable sealing that does not shrink or crack over time.

Insulation around the frame:
Proper insulation reduces cold spots and helps prevent condensation risk at the perimeter.

Water management:
Good installs manage water like a roof does: assume water can get in, then provide a path for it to get out safely. Flashing and sill details matter, especially in wind-driven rain.

Interior finishing:
Neat trim is nice, but it is also a chance to confirm that gaps are sealed, corners are tight, and the opening is stable.

If you are comparing quotes, ask what steps are taken to address air sealing and water management, not just what brand is being installed.

Choose upgrades strategically with a “comfort map”

Not every opening has equal impact. A smart approach is to prioritize:

  1. Rooms you use the most (living room, primary bedroom, kitchen)
  2. Problem exposures (north-facing cold rooms, west-facing overheating)
  3. Openings with visible moisture issues (condensation, staining, deteriorating sills)
  4. Main entry and patio doors (security, drafts, daily use)

This way, even if you phase the project, each step delivers a noticeable improvement.

Condensation is a clue, so treat it like one

Interior condensation is common during cold weather, but it should not be ignored. It can signal:

  • High indoor humidity from showers, cooking, or humidifiers
  • Weak insulation at the window edge or frame
  • Poor airflow near the glass due to heavy drapes or blocked vents
  • Sealed unit failure (fogging between panes is the giveaway)

A window upgrade can reduce condensation risk by improving surface temperatures, but it will not fix an oversized humidifier or consistently high indoor moisture on its own. Pair upgrades with practical habits like using bath fans, running range hoods, and keeping air moving near the glass.

Sound control is more than “thicker glass”

If road noise or neighbours are your main complaint, look beyond triple pane as a catch-all solution. Effective sound control often comes from a combination of:

  • Better air sealing (gaps leak sound as much as air)
  • Laminated glass options in key rooms
  • Slightly different glass thicknesses to disrupt vibration patterns
  • Upgraded door seals and thresholds

Noise reduction is very noticeable when air leakage is reduced, so again, installation and sealing details carry a lot of weight.

Security and daily usability should be part of the decision

Windows and doors influence how secure your home feels, but also how smoothly it functions. Consider:

  • Multi-point locks for patio doors when appropriate
  • Hardware that feels solid and aligns easily
  • Night latches and secure strike plates for entry doors
  • Egress requirements for bedrooms if you are changing sizes or styles

Usability matters. A window that is hard to open will not get used for ventilation, and a sticky patio door will eventually get forced, which shortens its life.

Make maintenance easy for future you

The best upgrade is the one you can live with easily. Before you commit, think about:

  • How you will clean exterior glass on upper floors
  • Whether the window style suits your ventilation habits
  • How resistant the finish is to fading on sunny exposures
  • What the warranty covers for hardware and sealed units

Small choices here reduce frustration for years.

A simple checklist before you sign anything

Use this as a practical wrap-up:

  • Do you know which rooms and exposures matter most for comfort?
  • Are you comparing real performance factors, not just frame material?
  • Have you asked how air sealing and water management will be handled?
  • Do doors include a plan for thresholds, weatherstripping, and alignment?
  • Have condensation and humidity been considered, not ignored?
  • Is the project scoped to reduce risk, especially if you are phasing upgrades?

When windows and doors are chosen with the home’s symptoms in mind and installed with care, the payoff is immediate: fewer drafts, more even temperatures, quieter rooms, and a home that simply feels easier to live in.

Elevating Everyday Living: Thoughtful Home Renovation Strategies

Home Renovation

In the heart of every Canadian home lies a story waiting to be rewritten. Whether it’s the creak of an aging floorboard or the dim glow of an outdated fixture, our living spaces whisper reminders of time’s passage. Yet, with a surge in homeowners choosing to invest in their current properties rather than chase new listings, renovations have become more than mere updates. They are acts of intention, transforming houses into havens that reflect our evolving lives. As families grow, work-from-home setups persist, and sustainability takes center stage, the call for smarter, more meaningful home improvements grows louder. This guide dives into strategies that not only refresh your space but also enhance its functionality and joy for years to come.

Kitchens often serve as the bustling core of family life, where meals are shared and memories forged. When embarking on updates here, turning to trusted kitchen remodeling professionals ensures that your vision aligns seamlessly with practical execution, blending aesthetics with enduring quality.

Mastering the Art of Planning

Effective home renovations begin long before the first hammer swings. Start with a clear vision: What pains your current layout? Is it the cramped hallway that bottlenecks morning rushes or the underutilized corner begging for purpose? Sketch rough ideas or use free digital tools to map out possibilities. Involve your household early; a shared wishlist prevents mid-project regrets.

Budgeting demands honesty. Allocate 10 to 20 percent as a contingency for surprises like hidden wiring issues. Prioritize high-impact areas: A fresh coat of paint can cost under $500 yet yield a 100 percent return in perceived value, while structural changes like opening walls might run $2,000 to $5,000 but redefine flow. Track expenses with simple apps that categorize spends, keeping you grounded amid the excitement.

Permits and codes are non-negotiable, especially in provinces with stringent building standards. Consult local bylaws via municipal websites to avoid fines that could derail your timeline. For instance, electrical upgrades must comply with the Canadian Electrical Code, ensuring safety without excess cost.

Embracing Sustainable Choices

Sustainability isn’t a buzzword; it’s a blueprint for resilient living. With Canada’s commitment to net-zero emissions by 2050, eco-friendly renovations reduce your carbon footprint while trimming utility bills. Opt for low-VOC paints that emit fewer toxins, improving indoor air quality for allergy-prone families. Reclaimed wood for flooring or cabinetry adds character and diverts waste from landfills, often at competitive prices through local salvage yards.

Energy efficiency pays dividends. Insulate attics and walls with blown-in cellulose, which boasts an R-value up to 3.7 per inch, far surpassing traditional fiberglass. Pair this with Energy Star-rated windows, which can slash heating costs by 12 percent in colder climates. Solar-ready roofing, even if not fully installed now, future-proofs your home against rising energy prices.

Water conservation matters too. Low-flow fixtures in bathrooms cut usage by 30 percent without sacrificing pressure. Native landscaping around entryways minimizes irrigation needs, fostering biodiversity in urban yards. These choices not only align with federal incentives like the Canada Greener Homes Grant but also appeal to eco-conscious buyers if you ever sell.

Recent data underscores this shift: In 2024, renovations accounted for 56 percent of all residential investment in Canada, totaling $103 billion, outpacing new construction as homeowners prioritize upgrades over relocations. This trend reflects a broader “renovate rather than relocate” mindset, with projections for 2025 estimating $61 billion in spending, supporting over 526,000 jobs nationwide.

Integrating Smart Technology

Gone are the days of static homes. Smart integrations elevate renovations from cosmetic to connective. Nestled thermostats learn your routines, adjusting temperatures to save up to 15 percent on energy. Voice-activated lighting systems, like Philips Hue, allow dimming via app or command, fostering ambiance for quiet evenings.

In living areas, consider built-in charging stations disguised as sleek outlets, eliminating cord clutter. Home theaters with recessed speakers and motorized screens turn spare rooms into cinematic retreats, ideal for movie nights under Canadian winters. Security upgrades, such as ring doorbells with motion alerts, provide peace of mind without invasive overhauls.

For multi-level homes, smart elevators or stair assists cater to aging-in-place needs, a growing priority as baby boomers settle into forever homes. These tech touches, starting at $200 per fixture, blend invisibly into designs, enhancing usability without overwhelming budgets.

Blending Indoor and Outdoor Realms

The line between inside and out blurs in thoughtful renovations, especially in Canada’s varied climates. Expand patios with weather-resistant composite decking that withstands freeze-thaw cycles, creating seamless transitions from kitchen sliders to al fresco dining. Vertical gardens on exterior walls purify air and soften urban facades, using drought-tolerant perennials suited to regional hardiness zones.

Interior courtyards or sunrooms, glazed with triple-pane glass, invite natural light year-round while buffering against drafts. In prairie provinces, earth-sheltered designs bury walls partially for thermal mass, stabilizing temperatures naturally. These extensions boost square footage affordably, often under $150 per square foot, and foster wellness through biophilic connections.

Boosting Functionality in Key Spaces

Tailor renovations to daily rhythms. Bedrooms benefit from custom built-ins: Murphy beds fold away for dual-purpose guest rooms, maximizing floor space in compact bungalows. Closets with pull-out organizers streamline mornings, reducing stress in fast-paced households.

Home offices demand acoustic panels to dampen echoes, paired with ergonomic heights for video calls. Kitchens thrive on ergonomic triangles, positioning sink, stove, and fridge within efficient loops. Bathrooms evolve with heated floors and rain showers, turning routines into rituals.

For growing families, flexible zones shine. Movable partitions in great rooms adapt from play areas to study nooks, using lightweight frosted glass for privacy without isolation. These adaptations ensure spaces scale with life stages, from toddler chaos to teen independence.

Navigating Challenges with Grace

Renovations test patience, but foresight smooths the path. Dust containment with plastic sheeting and air purifiers preserves health during demo phases. Communicate timelines with neighbors to maintain goodwill, particularly in close-knit communities.

Hire vetted tradespeople through references or licensed directories, verifying insurance to shield against liabilities. Phased approaches, like tackling one floor at a time, minimize disruption, allowing normalcy amid progress.

Emotionally, view the mess as metamorphosis. Journal progress photos to celebrate milestones, reinforcing that temporary chaos yields lasting harmony.

The Lasting Rewards

Home renovations transcend bricks and mortar; they sculpt sanctuaries that nurture body, mind, and spirit. By planning meticulously, choosing sustainably, weaving in tech, and honoring flow, you craft environments that evolve with you. In a nation where 94 percent of homeowners plan to stay put, investing in these upgrades isn’t just wise—it’s transformative. Your home becomes a testament to intention, a space where comfort meets creativity.

As seasons shift and needs change, revisit your design with fresh eyes. Perhaps that unused attic calls for conversion, or the backyard yearns for a fire pit oasis. Whatever the spark, embrace it. In doing so, you not only elevate your living but enrich the legacy of your home.

The Calm, Clean Way to Paint a Room That Actually Lasts

Paint

A fresh coat of paint is one of the few home improvements that can change how a space feels in a single weekend. But the difference between “looks great for a month” and “still looks great years later” almost always comes down to what happens before the first dip of the roller.

If you have ever painted and ended up with peeling at the baseboards, flashing on the walls, or mysterious stains coming back through, you are not alone. The good news is that most of these problems are predictable, and preventable, with a methodical approach.

If you are looking for practical guidance from a Trusted Painting Company in Toronto without turning this into an ad, you are in the right place. Let’s walk through the steps and decisions that make paint look smooth, wear evenly, and stay that way.

Start with a five minute “wall check”

Before buying paint, take a slow lap around the room with bright light (your phone flashlight works). You are looking for issues paint will not hide:

  • Shiny patches: Often old repairs, grease, or areas cleaned aggressively. These can cause uneven sheen.
  • Hairline cracks: Common around doors, corners, and ceiling lines. They telegraph through paint unless filled.
  • Nail pops and dents: Even small ones become more obvious after repainting.
  • Stains: Water marks, smoke, cooking oils, and kid art all need the right primer.
  • Chalky or dusty paint: Rub the wall with your hand. If you get a powdery residue, paint may not bond well without proper prep.

This is the moment to decide whether you need a simple repaint or a small repair project first.

Prep that saves you from repainting

Most paint failures are prep failures. Here is what matters most.

Clean where hands and air have been

Walls near light switches, kitchens, stair rails, and hallways collect oils and grime. Paint does not stick well to grease, even if the wall looks clean. Use a gentle degreaser or a mild soap solution and rinse with clean water. Let it dry fully.

A practical rule: if you would not tape to it confidently, do not paint over it.

Sand to remove texture problems, not to punish yourself

You do not need to sand every wall to bare drywall. You do need to sand:

  • Glossy areas so the surface becomes lightly dull
  • Rough patches from old drips or heavy roller texture
  • Raised edges around repairs so the wall feels flat to the touch

Use fine grit sandpaper and focus on feathering edges. Wipe the dust off with a damp cloth or microfiber.

Patch, then spot prime

Spackle and joint compound absorb paint differently than surrounding walls. If you paint directly over patches, you often get “flashing,” where repairs show as duller or shinier spots from certain angles.

After patching and sanding, spot prime repairs before the final coat. It is a small step that makes a big visual difference.

Primer is not optional when stains or bonding issues exist

Primer is not about spending more. It is about controlling what the finish coat can do.

Use primer when you have:

  • Water stains: You need a stain blocking primer, not just extra paint.
  • Smoke or heavy cooking residue: These can bleed through, even after cleaning.
  • Raw drywall or large patches: For uniform sheen.
  • Very glossy old paint: A bonding primer helps the new paint grip.
  • Colour changes with big contrast: Primer can reduce the number of finish coats.

One helpful mindset: paint is for beauty, primer is for behaviour.

Choose the right sheen for how the room is used

Sheen affects durability and how visible wall imperfections become.

  • Flat or matte: Best for hiding imperfections and giving a soft look. Not ideal for heavy scrubbing.
  • Eggshell: A favourite for living rooms and bedrooms because it balances washability and a forgiving finish.
  • Satin: Great for busy hallways, kids’ rooms, and areas that get touched often.
  • Semi gloss: Common for trim and doors because it handles cleaning and highlights detail.

If your walls are not perfectly smooth, going too shiny will make every bump and patch more noticeable, especially with side lighting from windows.

Colour looks different once it is on the wall

Paint chips are a starting point, not a verdict. The same colour can look warmer or cooler depending on exposure, flooring, and even nearby buildings.

Two useful techniques:

  • Sample large: A small swatch can mislead. Paint a bigger sample area or use sample boards you can move around.
  • Check at different times: Morning, afternoon, and evening light can change the feel dramatically.

Also consider how colour transitions from room to room. A home feels more intentional when undertones work together, even if each room has its own personality.

Tools and technique that make a pro level finish

You can buy premium paint and still end up with streaks if the application is rushed.

Roller nap matters

  • Smooth walls: shorter nap
  • Light texture: medium nap
  • Heavier texture: longer nap

Using the wrong nap is a quick path to splatter or an uneven finish.

Cut in like you mean it

Cutting in is painting a clean border along ceilings, trim, and corners before rolling. The best results come from:

  • A quality angled brush
  • Not overloading the brush
  • Keeping a wet edge so brushed areas blend into rolled areas

Work in sections

Paint a wall in manageable vertical sections and keep the edge wet. Many lap marks come from letting one area dry before you roll into it again.

Drying is fast, curing is slow

Paint may feel dry to the touch relatively quickly, but it takes longer to fully harden. This is why fresh paint can scuff easily or feel tacky when you put furniture back too soon.

Practical tips:

  • Avoid heavy washing early on. Use gentle cleaning at first.
  • Be careful with painter’s tape removal. Pull it back slowly at an angle.
  • Ventilate well and maintain steady indoor conditions for the best finish.

If you live in a climate with big seasonal swings like Southern Ontario, indoor humidity and temperature changes can affect how paint levels and cures. Comfort for you is usually comfort for paint, too.

Small details that make the room feel “done”

These finishing moves often separate an okay repaint from a transformation:

  • Straight caulk lines where trim meets the wall, especially in older homes with settling gaps
  • Crisp trim paint on baseboards and door casings
  • Even coverage behind doors and near edges where rollers sometimes miss
  • Consistent sheen across walls by using the same product and method throughout

Take a step back between coats and inspect in angled light. It is easier to fix a missed spot now than after everything is put back.

Maintenance that keeps paint looking fresh

A few habits can extend the life of your paint job:

  • Use felt pads on furniture that touches painted surfaces
  • Clean fingerprints with a damp microfiber, not abrasive sponges
  • Deal with moisture quickly in bathrooms and kitchens, using exhaust fans
  • Touch up with the same paint batch and sheen when possible, because sheen shifts can show

If you keep a small labelled jar of the original paint, future touch ups are far less stressful.

When it is worth calling in help

DIY painting is absolutely doable. But there are times when professional experience saves money and frustration:

  • Repeated peeling or bubbling that suggests moisture or adhesion problems
  • Extensive cracks, failing drywall tape, or older plaster repairs
  • Stain issues that keep returning through paint
  • High ceilings, stairwells, or hard to access areas where safety and clean lines get tricky

Even if you do most of the work yourself, getting advice on products and prep for your specific walls can prevent the common redo cycle.

A great paint job is not magic. It is a series of small, correct decisions. Clean, repair, prime where needed, choose sheen thoughtfully, and apply with patience. Do that, and the room will not just look fresh on day one, it will stay calm and clean looking long after the furniture is back in place.

Titan Elite 3000 Parts to Restore Peak Performance

Titan Elite

Introduction

Let me explain this the same way I’d explain it to you on a phone call. If your Titan Elite 3000 isn’t spraying the way it used to, most of the time the machine isn’t finished — it’s just asking for the right parts. These sprayers are built tough, but like any professional tool, wear and tear is normal. The good news is that Titan Elite 3000 parts are widely available and designed to bring your sprayer right back to peak performance.

Understanding titan elite 3000 sprayers parts will help you save money and prevent downtime and keep all your projects on track as both a daily contractor sprayer user or a dedicated DIY user. Investing in new components for the sprayer instead of buying an entirely new system will restore its brand new feel.

This guide teaches readers about vital parts in addition to their function as well as why selecting the appropriate replacement component becomes significant. The content offers non-technical solutions that readers can apply effectively in real situations.

Pump Assembly: The Heart of Your Sprayer

Titan Elite 3000 pump assembly functions as your pump’s core engine. When the pump develops weakness or starts leaking or loses pressure the whole system becomes compromised. Your system returns to proper pressure levels with stable paint movement when you integrate authentic titan elite 3000 replacement parts after fitting deteriorated pumps.

The seals and packings inside the pump will wear down when the pump operates continually generating friction. An unwanted paint leakage emerges while pressure reductions together with pulsation takes place. The internal parts replacement restores suction performance so your sprayer maintains optimum efficiency.

A regular pump maintenance program positions hyyou to protect all titan elite 3000 sprayers components too. Appropriate pressure stability environment for hoses and tips together with the motor results in decreased stress and less frequent breakdowns with extended machine operation life.

Spray Gun and Rebuild Kits for Precise Control

Control occupies the spray gun. You should examine spray gun components when your trigger feels slacking or your spray fan displays erratic performance or when your paint forms drips on button release. Titan Elite 3000 parts feature rebuild kits that deliver precise spray performance alongside optimum trigger functionality. These rebuild kits restore smooth trigger action and accurate spray output.

The firearm contains tiny vital components including needles together with springs as well as seals. Wear develops at gradual levels which causes problems to develop slowly over time. Rebuild kits substitute everything simultaneously which simplifies the repair process more than solving separate issues one by one.

Once rebuilt, your spray gun delivers cleaner cut-offs, better atomization, and less overspray. That means less wasted paint and a more professional finish on every job.

Spray Tips and Guards for Professional Finish

Professional know these parts are end components of spray equipment because they stop functioning after limited time. When tips become worn they lead to tails and substandard coverage and increased overspray. When correct titan elite 3000 sprayers parts replace old tips they deliver immediate improvement to finish quality.

Tip guards matter just as much as all the other parts. The tips stay safe because these holders keep them in place while they deflect impacts and enable fast removal of clogs by turning. A broken guard distorts spray projectile pattern while presenting potential risks thus necessitating removal should be your priority.

A proper tip size matching your material limits motor and pump workload. This tiny detail has a major influence on ensuring that Titan Elite 3000 runs optimally.

Hoses and Fluid Lines for Consistent Flow

Paint hoses handle substantial wear. Thick coatings, high pressure combined with continuous movement result in equipment breakdown. Titan elite 3000 hoses engineered with high quality resist flow limitations under these requirements.

When hoses develop cracks or bubbles or lose pressure their spraying becomes inconsistent which produces safety hazards. Replacing old fluid lines creates stable pressure which supports consistent surface coverage for large areas.

The pump experiences less strain when you install a new hose. Painting operations which proceed smoothly reduce the strain of the system which results in better protection of titan elite 3000 sprayers components from early breakdown.

Filters and Strainers to Protect Internal Components

Behind filters which appear minor exists the huge health impact which controls sprayer functioning. Multiple filters inside Titan Elite 3000 parts keep debris away from delicate internal elements. The filters inside Titan Elite 3000 parts work to protect essential internal parts by blocking debris. Clogged or damaged filters cause flow restrictions that push pumps into extra work. The resulting effects include pressure fluctuations combined with inconsistent spray patterns. A regular filter replacement schedule generates smooth operational performance. Maintaining filtration purity protects both spray tips together with gun components. The system produces better finish quality while components last longer when it allows fewer particles to pass through its filtration system.

Motor and Electrical Components for Reliable Power

Functional spraying system derives its power from the motor. Although motors are designed to be strong components electrical systems require maintenance since switches capacitors and cords gradually deteriorate. Genuine titan elite 3000 parts deliver accurate mounting and guaranteed safe use.

Sprayer face starting problems or shut down accidentally during operation or power loss during use can result from damaged electrical equipment. The system maintains steady performance following the replacement of these components together with extended protection from major breakdowns.

Proper electrical components safeguard the motor from damage. There will be fewer motor overheating issues and the motor will last longer when power delivery remains steady.

Prime and Pressure Control Valves for Smooth Operation

Prime and pressure control valves regulate how paint moves through the system. When these parts wear out, you may experience pressure spikes, poor priming, or difficulty switching modes.

Replacing worn valves with proper titan elite 3000 sprayers parts restores smooth pressure adjustment and reliable priming. This makes startup faster and reduces paint waste.

Good pressure control also improves spray consistency. You get predictable results every time you pull the trigger, which is exactly what professionals expect.

Wheels, Frames, and Hardware for Jobsite Durability

The outer structure of your sprayer matters more than people think. Wheels, frames, and hardware take constant punishment on job sites. Titan elite 3000 parts include durable replacements that keep your unit stable and mobile.

Damaged wheels make transport difficult and increase the risk of tipping. Replacing them improves balance and protects internal components from shock.

A solid frame also ensures proper alignment of internal parts. Everything works better when the sprayer is physically stable and well-supported.

Why Using Genuine Titan Elite 3000 Parts Matters

Let me be very clear here — not all replacement parts are equal. Genuine titan elite 3000 parts are engineered to exact specifications, ensuring perfect fit and performance.

Aftermarket parts may look similar, but small differences in materials or tolerances can cause leaks, pressure loss, or premature failure. That ends up costing more in the long run.

Using original parts protects your investment, maintains safety standards, and ensures your sprayer performs exactly the way Titan parts designed it to.

Conclusion

So here’s the bottom line, just like I’d say it straight to you on a call. If your sprayer isn’t performing, don’t panic and don’t replace the whole unit. The right titan elite 3000 sprayers parts can restore power, precision, and reliability without breaking the bank.

From pumps and hoses to filters and spray tips, every component plays a role in overall performance. Keeping these parts in good condition means less downtime, better finishes, and longer machine life.

Investing in quality titan elite 3000 parts is the smartest way to keep your sprayer running strong and your projects moving forward with confidence.

Reliable Plumber in Coogee and Rose Bay – Fast & Affordable Plumbing Services

Plumber

Plumber in Coogee

Reliable Plumbing Services in Coogee

Looking for a trusted plumber in Coogee? Whether it’s a leaking tap, blocked drain, or urgent hot water issue, our experienced team provides fast, professional, and affordable plumbing solutions. We pride ourselves on delivering high-quality workmanship and exceptional customer service to residents and businesses across Coogee.

Our Plumbing Services Include:

  • Emergency plumbing repairs
  • Blocked drains and sewer solutions
  • Hot water installation and repair
  • Gas fitting and appliance servicing
  • Bathroom and kitchen plumbing upgrades

Why Choose Us?
We understand the local Coogee community and its plumbing needs. Our licensed plumbers use the latest tools and techniques to ensure the job is done right the first time. With transparent pricing and 24/7 availability, you can rely on us for both emergency and scheduled plumbing services.

Contact Your Local Coogee Plumber Today
Don’t let plumbing issues disrupt your day. Call our team for a prompt, professional response and quality plumbing solutions in Coogee.


Plumber in Rose Bay

Trusted Plumber in Rose Bay

When you need a dependable plumber in Rose Bay, look no further. Our skilled team offers a full range of plumbing services, from minor repairs to major installations, ensuring your home or business runs smoothly. We focus on delivering high-quality results and a hassle-free experience for all our Rose Bay customers.

Comprehensive Plumbing Solutions:

  • Emergency plumbing and leak detection
  • Drain clearing and maintenance
  • Hot water system repair and replacement
  • Gas fitting and appliance servicing
  • Renovations, bathroom, and kitchen plumbing

Why Residents Choose Us in Rose Bay
We are proud to serve the Rose Bay community with fast, reliable, and professional plumbing services. Our licensed plumbers bring years of experience, ensuring every job meets the highest standards. Flexible scheduling and transparent pricing make us the trusted choice for all your plumbing needs.

Get in Touch with Your Rose Bay Plumber
From routine maintenance to urgent repairs, our team is ready to help. Contact us today for expert plumbing services in Rose Bay you can count on.

Professional Wood Floor Refinishing in Seattle WA

wood

Being a business owner, you should understand the importance of making a strong first impression. 

Whether it’s a retail space, office, or restaurant, the condition of your floors plays a significant role in how your business is perceived. 

If your wood floors have lost their shine, are showing signs of wear, or simply look outdated, it might be time to consider refinishing them. 

Wood floor refinishing in Seattle, WA can restore the beauty of your floors and give your space a fresh, professional look that reflects the quality of your business.

Sandless in Seattle specializes in wood floor refinishing and has years of experience helping businesses revamp their interiors with top-rated, efficient services. 

Keep reading to learn more about how refinishing your wood floors can benefit your business and why Sandless in Seattle is the ideal choice for the job.

The Benefits of Wood Floor Refinishing for Businesses

Wood floors add warmth and sophistication to any business environment, but over time, they can become worn or damaged. 

Here’s why wood floor refinishing is a smart choice for business owners:

  1. Aesthetic Appeal: A well-maintained wood floor immediately enhances the overall look of your space. Whether you’re aiming for a modern or rustic look, refinishing can bring your floors back to life, making them look new again.
  2. Increased Property Value: Refinishing your wood floors can increase the value of your property. Whether you’re leasing or selling your business property in Seattle, well-maintained floors will make your space more appealing to potential buyers or tenants.
  3. Durability: Refinishing extends the life of your wood floors, making them more resistant to scratches, moisture, and other daily wear. This helps protect your investment, especially in high-traffic areas.

Why Choose Sandless in Seattle for Your Refinishing Needs

When it comes to wood floor refinishing in Seattle, Sandless in Seattle is a trusted name. 

They bring years of experience to every job, ensuring high-quality results for both residential and commercial properties. 

Here’s why you should choose them for your refinishing needs:

  1. Expertise: With years of experience in the Seattle area, Sandless in Seattle knows the unique needs of local businesses. They have built a reputation for excellence in customer service and craftsmanship.
  2. Dustless Refinishing Process: Refinishing using a dust-free refinishing technique keeps your workspace cleaner and reduces downtime. Their innovative process leaves little mess behind, making it ideal for businesses that want minimal disruption.
  3. Eco-Friendly Materials: Using high-quality, eco-friendly finishes that are safe for both your employees and customers ensuring a healthier environment while also delivering lasting results.
  4. Customizable Solutions: Every business is different whether you need a light touch-up or a complete restoration, they can customize their services to suit your specific requirements.

How Wood Floor Refinishing Can Enhance Your Online Presence

Your website and social media profiles serve as key marketing tools that reflect your brand image. 

The condition of your physical space can play a major role in how your business is perceived online, especially when showcasing your property in marketing materials.

Refinished floors can make your business look more appealing in photos and videos, which can be shared on social media, Google My Business, or your website. 

A clean, polished space sends a message of professionalism and attention to detail, which can influence online reviews and SEO rankings.

Additionally, well-maintained floors can be leveraged for local SEO. 

The Sandless Refinishing Process: How It Works

At Sandless in Seattle, the refinishing process is designed to be efficient, effective, and low-impact for your business operations. 

Here’s how it works:

  1. Assessment and Preparation: A team member assesses your wood floors to determine the extent of refinishing needed. They’ll discuss your goals and expectations to create a plan that suits your needs.
  2. Quick Turnaround: The refinishing process typically takes 1-2 days, depending on the size of the area. Since there’s no sanding involved, there’s minimal downtime, allowing your business to resume operations with minimal disruption.
  3. Final Touches: Once the refinishing is complete, your floors will have a fresh, glossy look that will last for years. The team ensures that every detail is attended to, providing you with flawless results.

Invest in Your Business with Professional Wood Floor Refinishing

Wood floor refinishing in Seattle, WA is an investment that can significantly enhance the appearance and value of your business. 

Whether you’re looking to create a more inviting atmosphere for customers or improve your online visibility, refinishing your floors is a smart choice. 

Contact Sandless in Seattle today to schedule your wood floor refinishing service and enjoy a cleaner, more professional space!

FAQs Wood Floor Refinishing in Seattle WA

How often should wood floors be refinished?

Wood floors should be refinished every 7-10 years, depending on foot traffic and the floor’s condition. 

Refinishing can restore the wood’s beauty and extend its lifespan.

What are the advantages of dustless refinishing?

Dustless refinishing eliminates the mess and downtime associated with traditional sanding. 

It’s a cleaner, faster, and more efficient method, perfect for busy businesses.

Can wood floor refinishing help with scratches and stains?

Yes, refinishing can effectively remove scratches, stains, and minor damage. 

It smooths out imperfections and restores the original beauty of the wood.

Is refinishing the same as sanding?

Refinishing involves applying a new finish to your floors, whereas sanding removes the old finish and surface layer. 

Sandless in Seattle uses a refinishing method without sanding, making it less disruptive.

What’s the usual duration to finish the process?

The refinishing process usually takes 1-2 days, depending on the size of the area. 

There’s minimal downtime, allowing your business to continue operations with minimal interruption.